This section describes the functionality of the Lab Manual. Screen-shot of the Lab Manual window is given below:
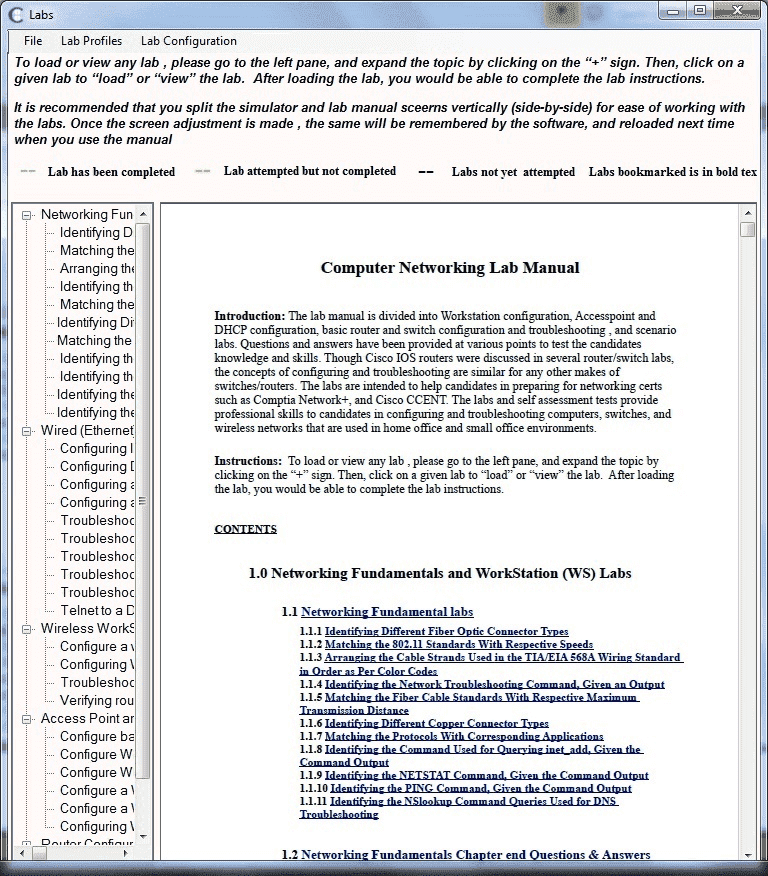
Lab Manual provides exercises on computer networking. Available Network+ labs are listed on left pane of the manual.
To view or execute any of these labs click on the particular lab from the left navigation pane a View and load lab window appears as shown in the below fig.
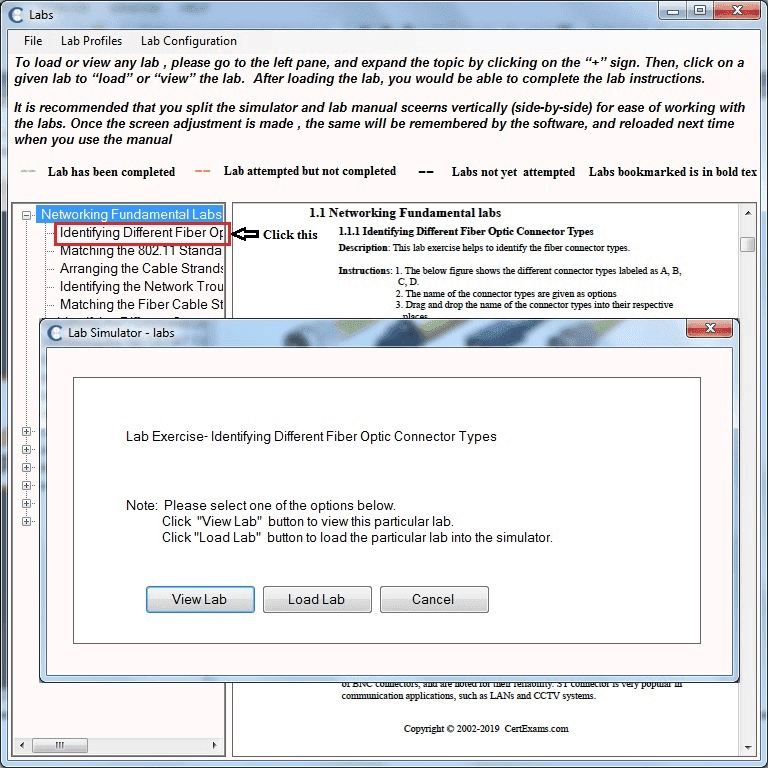
View Lab: This button allows you to view the particular lab in the Lab Manual.
Load Lab: This button allows you to load a selected lab in the simulator where you can configure the devices and verify the output.
Completed lab will be marked as green in left navigation pane and half completed lab is marked as orange color and not attempted lab is marked as black color , bookmarked lab is marked in bold as shown in below fig.

Cancel: This button cancels the option and move the control back to Lab Manual window.
You can also view and load the lab by right clicking on the labs on the left pane , popup menu window appears as shown in the below fig.
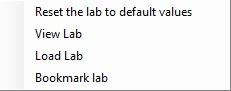
Reset the lab to default values will allow you to reset the lab to default values , device configurations are reset to default values
View Lab allows you to view the particular lab in the manual.
Load lab will load the selected lab in the simulator.
Bookmark lab allows you to bookmark any of the lab for later use or for learning.
1. File Menu:The File menu in the top of the Lab Manual window has the following options as shown in the below fig.
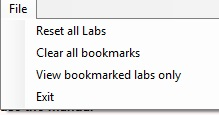
Reset all labs: This option will reset all the labs to default values.
Clear all bookmarks: This option will clear all the bookmarked labs.
View bookmarked labs only: This will list all the bookmarked labs for viewing'
Exit: This option allows you to exits from the Lab Manual and gives control back to the Main program window.
2. Lab Profiles Menu:
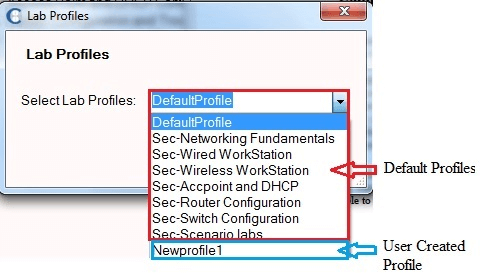
Click Select Profiles option to load the lab profile. A drop down with Default Profiles and User created profiles will be listed. Select any of this profile to load in the simulator. By default “DefaultProfile” will be loaded with all labs enabled. For each section there will be a default profile , user cannot edit these profiles. User select any of these default profiles and practice the labs enabled on these profiles. User can also create and edit his own profiles.
3. Lab Configuration:The Lab Configuration menu in the top of the Lab Manual window allows admin to set the parameters for the lab environment (show Answer,Verify Answer, Viewing the labs and loading the labs). It has the following option as shown in the below fig.
Add Lab Profile:Click this to add/create a new Lab Profile and include the labs enabled under this profile. When you click this you will be prompted login. Where admin can enter his Email-id , user name and password and click OK button to proceed with the Lab Configuration to add a new profile.
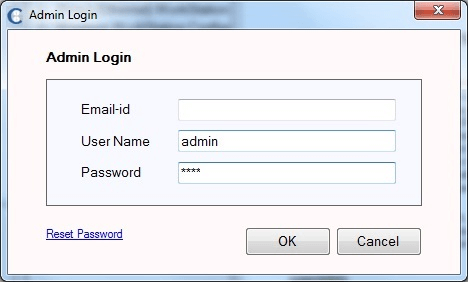
Reset Password: Reset Password option in Admin Login screen allows admin to reset his password which is stored locally. Reset Password window is shown below. After resetting password login details is mailed to "cs[at]swregn.com"
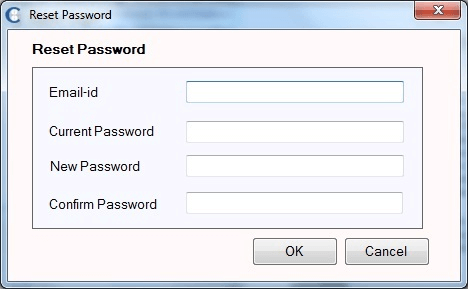
1. Email-id: User current email-id is displayed. He can also change his email-id here.
2.
Current Password: User has to enter his old password before resetting his password.
3.
New Password: Enter the New Password here.
4.
Confirm Password: Enter this to verify the entered New Password is correct.
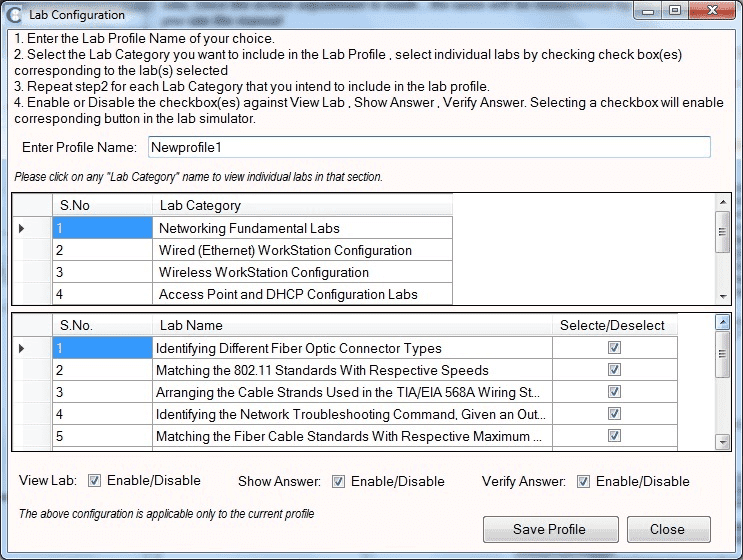
Below is the screen shot of Lab Configuration window to add a new profile.
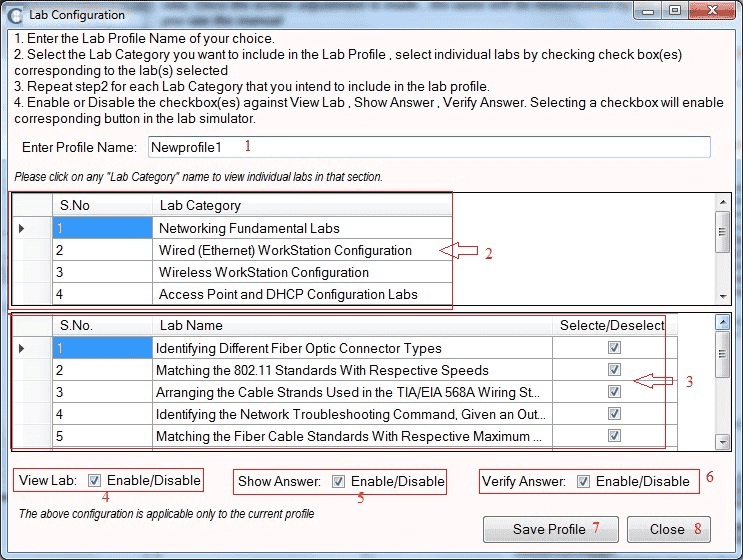
Various information/feature available on Lab Configuration are (All are in order of marking in the figure above):
1. Enter Profile Name: Allows to enter the name of profile
2. Lab Category: Labs are displayed category wise , click any of the category to display labs(sub labs) under that category.
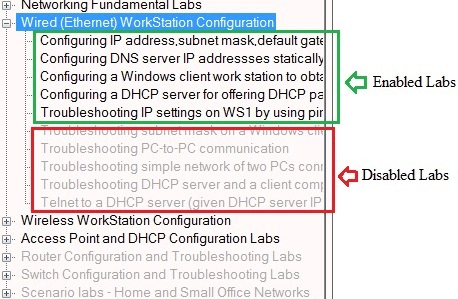
3. Labs(Sub Labs): List of labs under each category is displayed, Select/Deselect check box allows to select or deselect the lab. User can load the lab which ever selected. Deselected labs cannot be loaded in the simulator, those labs are disabled for selected profile as shown below.
5. View Lab:By selecting this check box allows View Lab option for all labs in the simulator. Unchecking this will disable View Lab option for all labs.
6. Show Answer: By selecting this check box allows “Show Answer” button is enabled in the Simulator for all labs, unchecking this will disable “Show Answer” button.
7. Verify Answer:By selecting this check box allows “Verify” button is enabled in the Simulator for all labs, unchecking this will disable “Verify” button.
8. Save Profile:Allows to save the configuration of the created profile.
9. Close: allows to to exit from Lab Configuration.
2.Edit/Delete Lab Profiles:This option allows admin to edit profile details or remove the profiles completely. A list of Lab Profiles will be provided, select the Profile Name whose details you want to edit and click on "Edit" button.
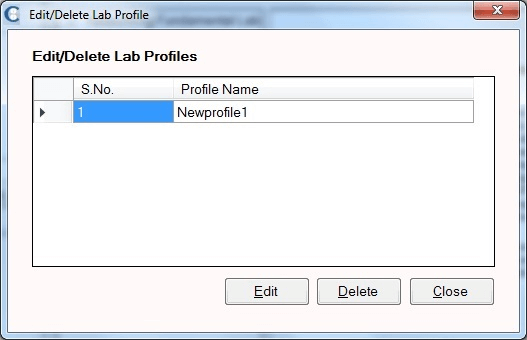
All the details of the profile will be provided. Make any changes required and click “Save Profile” to save changes.
To delete the profile select the profile from the list and click on "Delete" button.
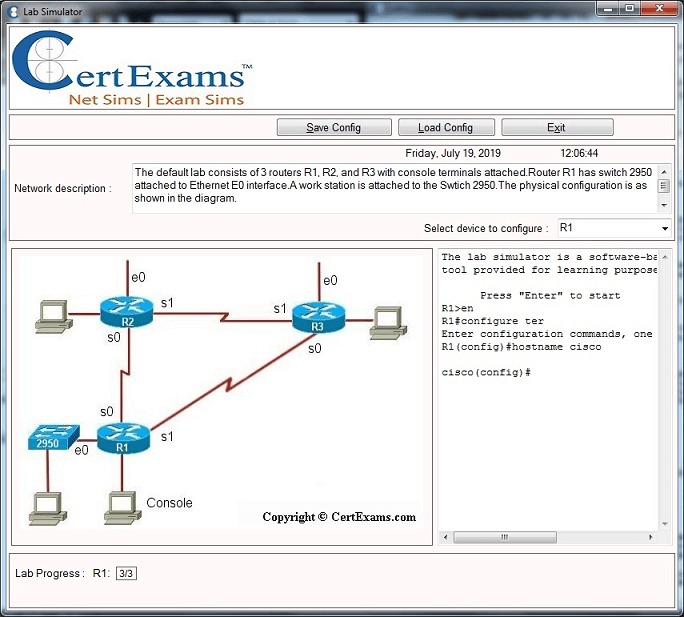
When you are executing the lab in the simulator a lab progress bar displayed on the bottom of the simulator window which contains number of steps required to configure each device , based on the correct configuration of the commands given in the manual counter will be incremented as shown in the following fig.
Cert-Ex™ Exam Simulators, Cert-Ex™ Network Simulator, Cert-Ex™ Cheatsheets are written independently by CertExams.com and not affiliated or authorized by respective certification providers. Cert-Ex™ is a trade mark of CertExams.com or entity representing Certexams.com.Network+™ is a trademark of CompTIA® organization.


