CertExams.com Simulator Lab Exercises Answers
Console Based :
Description: Configure static route 172.16.1.0 mask 255.255.255.0 with next hop address of 192.16.2.1.
syntax: ip route prefix mask {address|interface} [distance]
prefix mask is the ip route prefix and mask for the destination.
address|interface: Use either the next hop router ip or the local router outbound interface used to reach the destination.
distance is the administrative distance and an optional parameter
Instructions:
1. Enter into Global Configuration Mode
2. Configure a static route with destination sub-network number as 172.16.1.0, subnet mask as 24 and IP address of the next-hop router in the destination path to 172.16.2.1.
user@R1>configure
[edit]
user@R1#edit routing-options
[edit routing-options]
user@R1#edit static route 172.16.1.0/24
[edit routing-options static route 172.16.1.0/24]
user@R1#set next-hop 172.16.2.1
[edit routing-options static route 172.16.1.0/24]
user@R1#exit
[edit routing-options]
user@R1#exit
[edit]
user@R1#
GUI Based :
Instructions:
1. Select device R1 from select device drop down box
2. Click Configure button that enables left navigation pane for configure button.
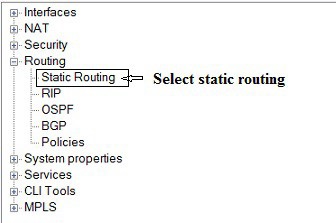
3. Select Routing -> Static Routing from left navigation pane
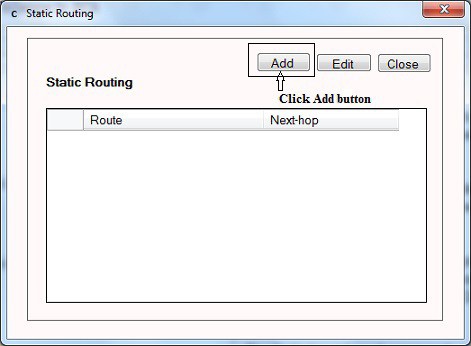
4. Static Routing window appears click Add button
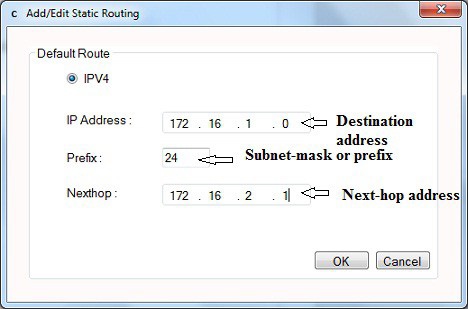
5. Add/Edit Static routing window appears ,enter destination address 172.16.1.0 and prefix 24 and next-hop as 172.16.2.1 and click OK button.
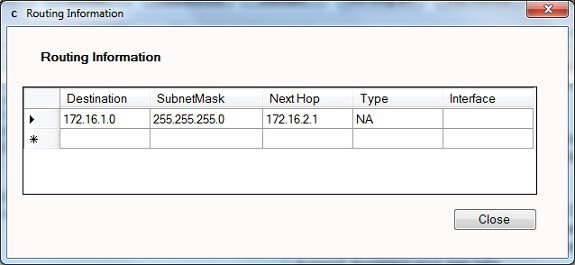
6. To view static routing click monitor button that enables left navigation pane
7. Click Routing -> Routing Information.
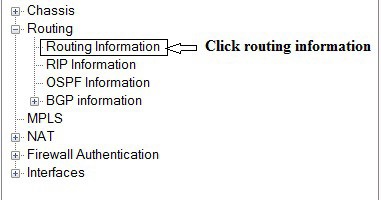
8. Routing Information window displays configured static routing details