CertExams.com Simulator Lab Exercises Answers
Console Based :
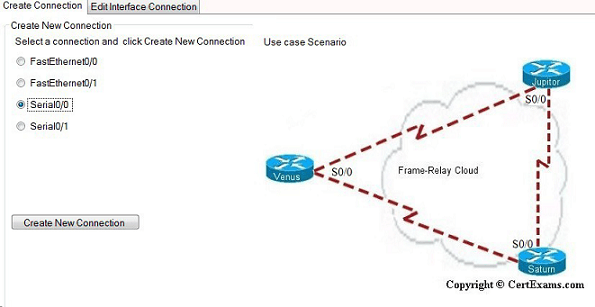
Description: Configure frame-relay without using sub-interfaces. This configuration example uses full mesh topology.

Note that on a frame-relay network without sub-interfaces, the LMI-type is automatically detected. Similarly, PVC DLCIs are learned through CMS status messages. There is no need to specify the same explicitly. On the otherhand, in a FR network with point-to-point sub-interface configurations, you need to specify the interface-dlci number.
Instructions:
IP Address Assignment Table
| Device | Interface |
| Venus-S0/0 | 192.160.1.1/24 |
| Jupitor-S0/0 | 192.160.1.2/24 |
| Saturn-S0/0 | 192.160.1.3/24 |
1. Specify frame-relay on S0/0 of Venus
2. Specify frame-relay on S0/0 of Saturn
3. Specify frame-relay on S0/0 of Jupiter
R1>enable
R1#configure terminal
R1(config)#hostname Venus
Venus(config)#interface serial 0/0
Venus(config-if)# encapsulation frame-relay
Venus(config-if)#ip address 192.160.1.1
255.255.255.0
Venus(config-if)#^z
Venus#
R2>enable
R2#configure terminal
R2(config)#hostname Jupiter
Jupiter(config)#interface serial 0/0
Jupiter(config-if)#encapsulation frame-relay
Jupiter(config-if)#ip address 192.160.1.2
255.255.255.0
Jupiter(config-if)#^z
R3>enable
R3#configure terminal
R3(config)#hostname Saturn
Saturn(config)#interface serial 0/0
Saturn(config-if)#encapsulation frame-relay
Saturn(config-if)#ip address 192.160.1.3
255.255.255.0
Saturn(config-if)#^z
Saturn#
GUI Based :
Instructions:
1. Select R1 from Select device drop down box , click Configure button, this enables left navigation pane.
2. In the left navigation pane Click Router > Router Options this displays Device Properties screen in that select Host Name and click Edit button
3. Host Name Configuration screen appears enter the host name as Venus and click save button.
4. Click Configure > Interface and Management > Interface and Connections. In Create New Connection tab select Serial 0/0 interface and click Create New Connection button.
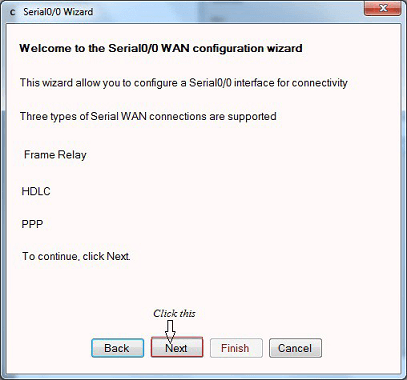
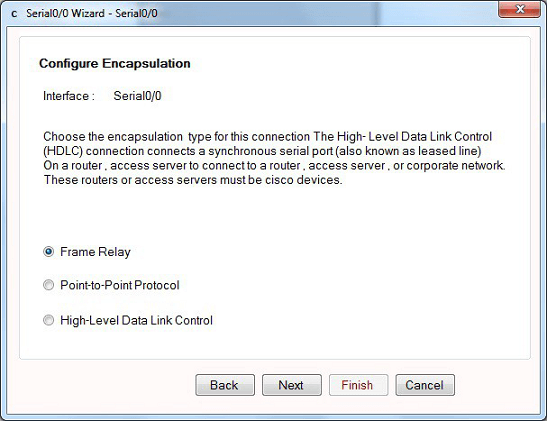
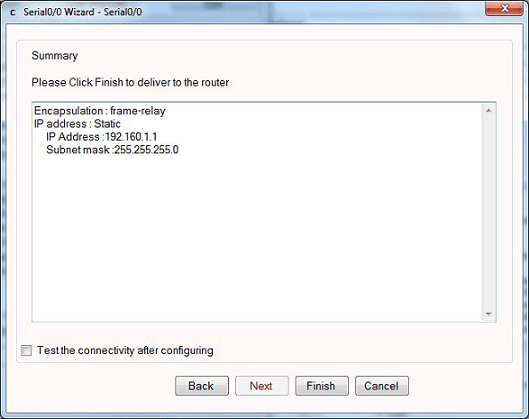
5. In Serial 0/0 interface wizard click Next button and select encapsulation frame-relay from the Next screen.
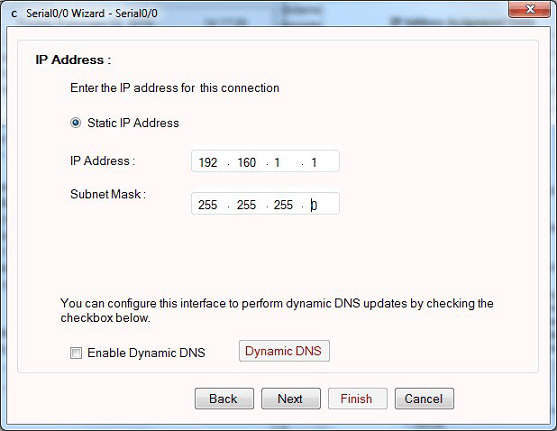
6. In Serial 0/0 IP address screen enter the ip address as 192.160.1.1 and mask 255.255.255.0 and click Next.
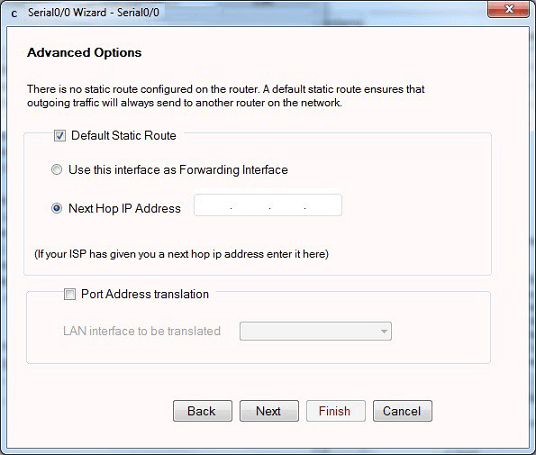
7. Configuring default route screen appears. It is an optional , you can skip this window by clicking Next button.
8. Serial 0/0 interface wizard summary screen appears click Finish button.
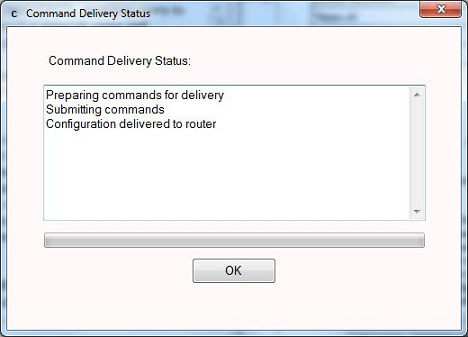
9. Command delivery status screen appears click OK button.
10. Repeat the step 1-8 for configuring router R2 with host name Jupiter , IP Address 192.160.1.2 255.255.255.0 and for router R3 with host name Saturn , IP Address 192.160.1.3 255.255.255.0 respectively.


